Woman tube: Maryse

This tutorial has been made with PSP9, it's also possible with other versions of PSP
If you want to present my tutorials on your forums or sites please ask to me first
If you publish your creation on a site or a blog,
please put a link towards the tutorial if you create a tag
Thank you to understand and respect the rules.
VM Distortion- Tilomat 2000
Alfs borders FX- Border film
Filters unlimited 2-Bkg Designer sf10 II> Line side line
Mehdi - Sorting tiles
Graphic plus- Cross Shadow
Materials
1 woman tube (MR_Keira Knightley)
1 misted paysage-Romantizm_Msrf Design
1 Deko flower
1 Framework
1 Wordart_Moment Unforgettable
1 Color palette
Note: You can change Blend Modes or opacity according your color
Used colors
Foreground Color #f9dbe5
Background Color #b00019
Tutorial
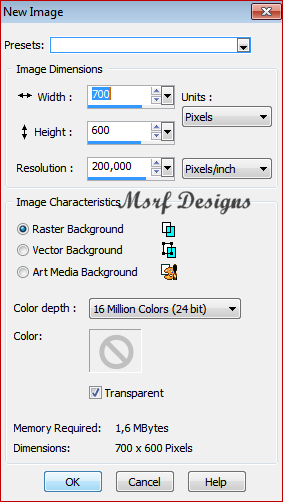
1.
Open a new transparent image of 700 x 600 pixels.
2.
 #b00019 #f9dbe5 #ffffff
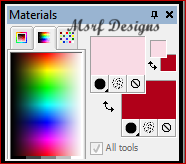
Open your Color palette
Set your Foregroundcolor to #f9dbe5
Set your Backgroundcolor to #b00019
3.
Change the foregroundcolor to Gradient, Foreground-Background:
Sunburst style
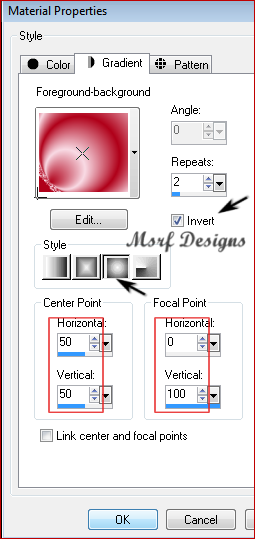
Flood Fill  with the gradient.
4.
Effects-plugıns- VM Distortion- Tilomat 2000
5.
VM Distortion- Tilomat 2000
Use the same effect again ( values are the same)
6.
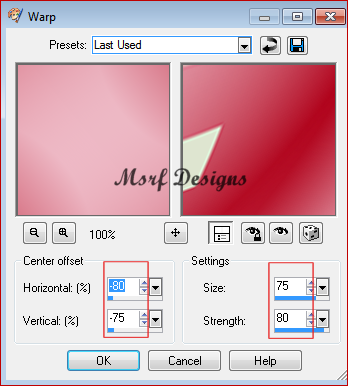
Effects-Distortion effects- Warp
7.
Layers- Duplicate
İmage-Mirror
Layers Properties Blend mode: overlay
Layers- Merge- Merge down
8.
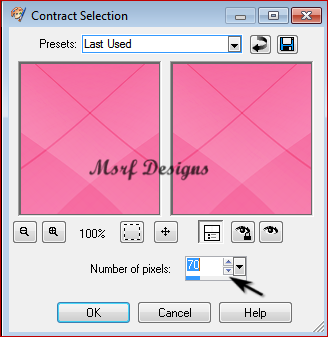
Selections- Select all
Layers- New raster layer
Selections- Modify-Contract 70
Flood Fill  with gradient.
9.
Selections-Select none
Layers- Duplicate
İmage- Mirror
İmage-Flip
In the Layer palette, Opacity 50
Layers-Merge- Merge down
10.
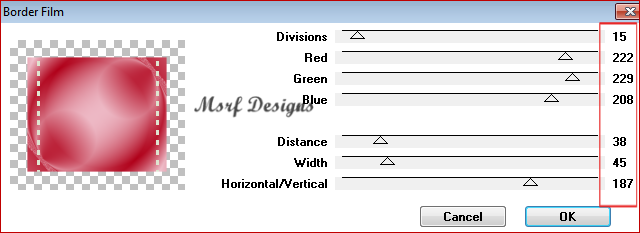
Effects-plugıns- Alfs borders FX- Border film
11.
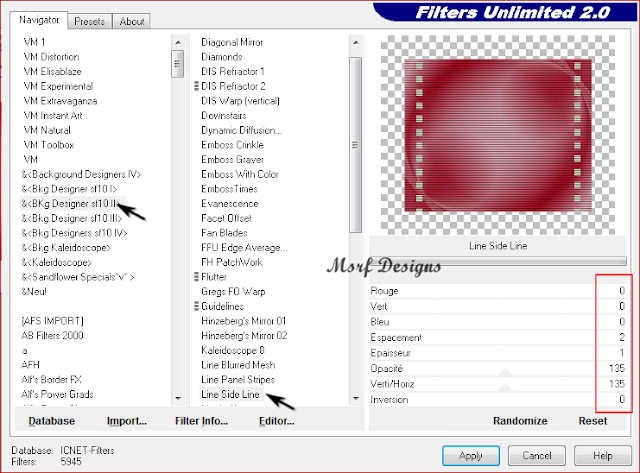
Effects- Plugıns > Filters unlimited 2-Bkg Designer sf10 II > Line side line
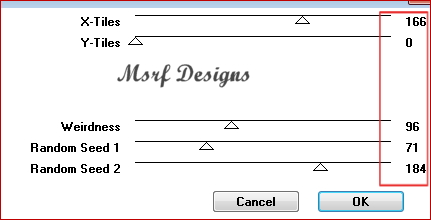
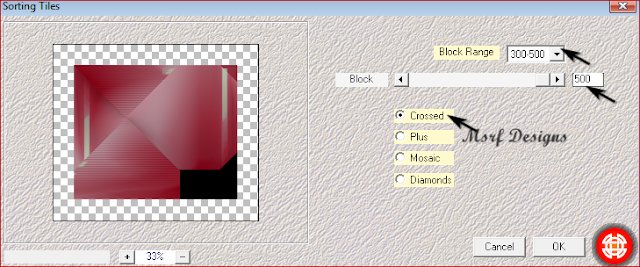
12.
Effects- Plugıns- Mehdi > Sorting tiles
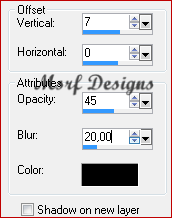
Effects- 3D Effects- Drop shadow
13.
Open the Framework png
Edit-Copy
Activate your work
Edit-Paste as new layer
14.
Activate Raster 2
Open the Moments Unforgetable_Msrf Design (paysage)
Edit- Copy
Activate your work
Edit-Paste as new layer
In the Layer palette, set Blend Mode to Overlay
Opacity: 70
15.
Activate top layer (Raster 3)
Open woman Tube
Edit- Copy
Activate your work
Edit-Paste as new layer
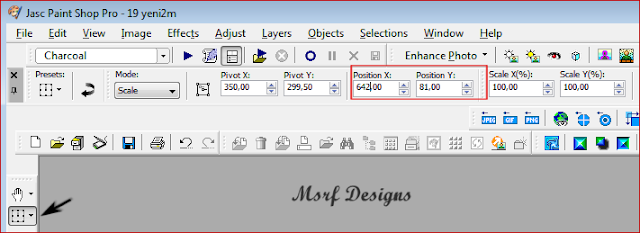
Image - Resize 65%, uncheck All Layers.
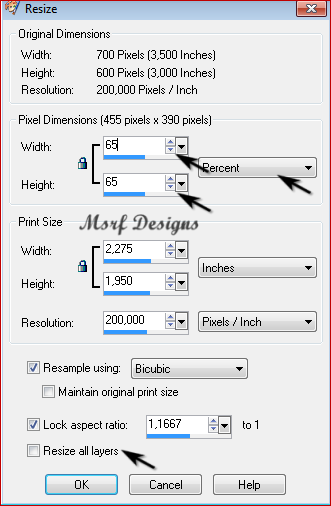
Adjust-Sharpness-Sharpen
put it on the left side
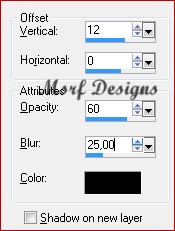
16.
Effects- 3D Effects- Drop shadow
7-0-45- 20 Black
17.
Open the wordart moments unforgettable
Edit-Copy
Activate your work
Edit-Paste as new layer
Image - Resize 90 %, uncheck All Layers
 Move to the top right
Layers- Duplicate
Move to the top right
Layers- Duplicate
Layers- Merge-Merge down
18.
Open the Deco flower
Edit-Copy
Activate your work
Edit- Paste as new layer
Active Deform tool, place it like this
Layers Properties > Blend mode:Hard Light
19.
Layers-New raster layer
Add your name or watermark
20.
Selections-Select all
İmage-Add borders, Symmetric, 15 px. color: #b00019
Selections-İnvert
21.
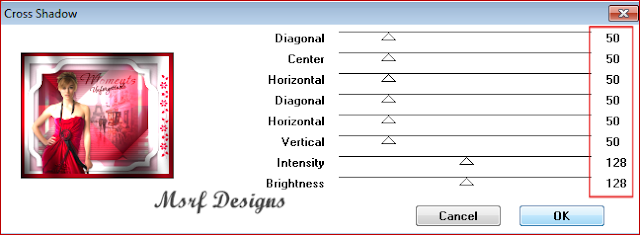
Graphic Plus- Cross Shadow with the standard settings:
22.
Selections- Select none
save as JPG file
If you wish you can post your result on my Facebook Page  or Google Page
Extra Example:
Woman tube: HazalDesign
Müşerref Özdaş
31.05.2018
 Yours all versions > Here
